Removal and installation of a locking cylinder
Here you can see how easy it is to remove and install a locking cylinder.
Approximately 95% of locking cylinders have a simple lock bit. The following description of removal and installation applies to these locking cylinders.
The following applies to these locking cylinders:
In 2 steps you have removed your old locking cylinder and in another 2 steps your new locking cylinder is again functional in the door lock.
Make sure that you specify the outside and inside of the cylinder exactly when ordering. The outer sides of some of our locking cylinders are reinforced to protect against break-ins. It is therefore important that the secure side of the cylinder faces outwards.
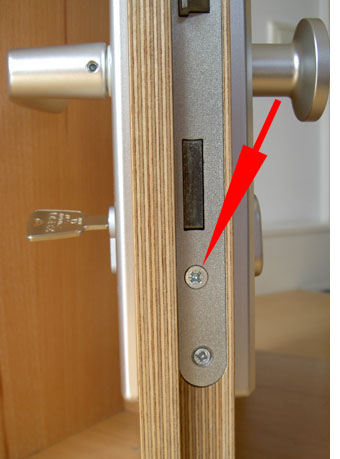 | Step 1 Loosen the fixing screw On the door lock, directly below the lock, there is a fixing screw ... |
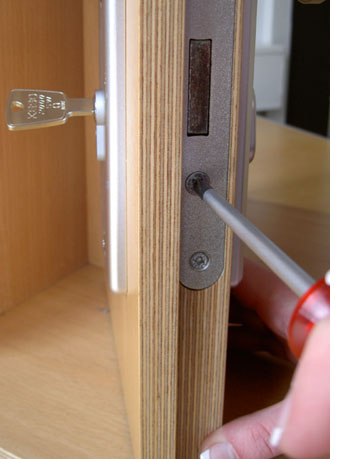 | ... loosen this (in most cases with a screwdriver) ... |
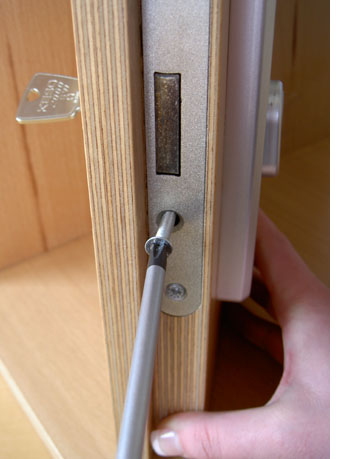 | ... unscrew the screw completely ... |
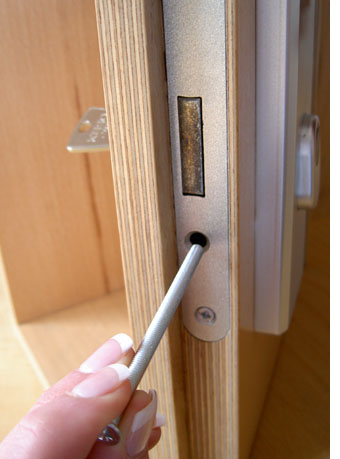 | ... and remove the screw from the thread. |
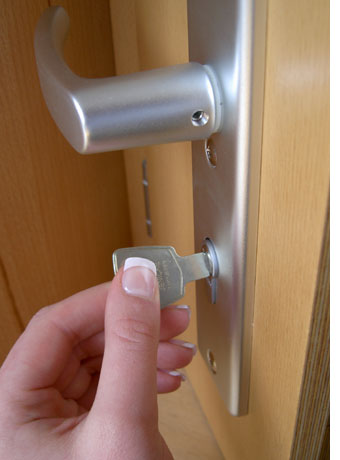 | Step 2 Removing the lock cylinder Insert the key into the locking cylinder and turn the key slightly so that the locking lug inside the door lock comes into the correct position, ... |
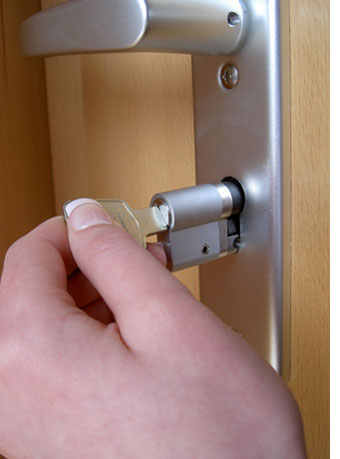 | ... to simply pull out the locking cylinder. If the lock cylinder is a bit stuck, a slight jiggle will help to pull it out ... |
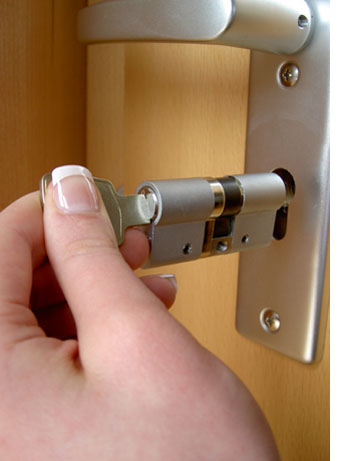 | ... and you have already removed the lock cylinder from the door lock. The installation works in the reverse order. |
 | The best way to measure the cylinder size is to remove it. First measure the outside of the locking cylinder by measuring from the centre of the threaded hole to the end of the cylinder on the outside. In our example, the outside dimension is 30 mm. |
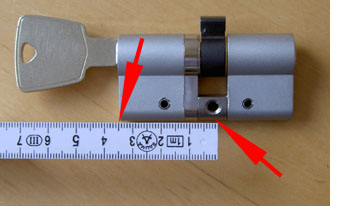 | Measure the inside of the locking cylinder by measuring from the centre of the threaded hole to the cylinder end of the inside. In our example this is 35 mm. Accordingly, our example cylinder has the dimension A 30/ I 35. |

Payment by invoice: Transfer of the invoice to PayPal. You can conveniently transfer the payment directly to PayPal after receiving the goods. You do not need a PayPal account.